A few people wanted to know how to make the photo cube I posted a few days ago, so I made this tutorial. Please keep in mind that this is my first tutorial....so go easy on me. Ha, ha! I used my cube as a photo display, but I know many of you could really get scrappy with these...and make some really awesome projects. Please feel free to share them if you make anything. I'd love to see them.
You will need a 12 x 12 sheet of sturdy card stock, and a cutter with a scoring blade. (Also any materials you are planning to use to decorate, of course).
 Remove your cutting blade, and use your scoring blade to score at ½, 3¼, 6, 8¾, and 11½ inches.
 Turn card stock so scored lines are horizontal, then score at 2¾, 5½, 8¼, and 11 inches as shown.
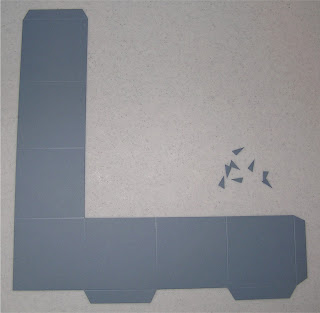
 Trim along the scored area as shown in the picture, and remove the excess. (If you would like to be conservative, just don't score where you know the blank space is).
 Trim the edges of the "tabs" as shown.
Bring the right side of the strip over to form the cube shape, and adhere with glue dots or sticky strip. If you are not planning to send in an envelope, bring the top flap around to finish the cube, (there will be some over lapping) tuck the flaps, and adhere with more glue dots or sticky strip. Decorate as you choose, and have fun!

Here is what the cube will look like when it's flattened for shipping. Just send some extra adhesive, so the receiver can form and secure the cube when it is received.


4 comments:
COOL! Thanks!
Thanks for sharing this idea - and tutorial! Can't wait to make one!
thanks for the tutoral, can't wait to try it. wouldn't that be cute decorated with Christmas paper?
OMG OMG your photo cube is amazing I can't wait to make one GF!! thank you for the awesome tutorial ..
Hopefully Saturday I will be up for the callenge
Thanks girlie
xoxox
Dawn
Post a Comment